
rust
Post Processing and Custom Shader Injection in Helio
How Helio handles post processing — the uber-pass design, multi-point shader injection, GPU volume blending, auto-exposure, bloom, color grading, and the post-process volume system with GPU-side spatial blending.

One Uber-Pass vs Composed Effects
Most rendering engines implement post processing as a chain of individual passes — one for bloom, one for tonemapping, one for vignette, one for chromatic aberration, one for grain. Each pass reads the output of the previous, applies its effect, and writes to a new texture. The chain grows linearly with the number of effects. Unreal Engine's post process chain can have a dozen or more intermediate textures in flight during a single frame.
We chose the opposite approach from the start: a single uber-pass that applies all post effects in one full-screen draw call. The PostProcessPass reads the HDR color buffer (pre_aa) and the depth buffer, runs compute dispatches for GPU volume blending, exposure, and bloom extraction, then executes one fragment shader that applies every enabled effect in sequence and writes directly to the swapchain target.
The argument for composed passes is modularity: you can enable, disable, and reorder effects independently. Each effect has its own shader, its own pipeline, its own bind groups. Debugging a composed chain is straightforward — you render any intermediate texture and see exactly which effect broke.
The argument for the uber-pass is bandwidth and frame time. With composed passes, your HDR color buffer gets read and written ten times per frame — once per effect — and each write costs full-resolution VRAM bandwidth. At 4K with an RGBA16Float target, that's 33 MB per read-write pair. Ten effects means 330 MB of bandwidth consumed on intermediate texture round-trips that the user never sees. On a desktop GPU with 800 GB/s bandwidth that's negligible. On a mobile GPU or an integrated GPU sharing memory with the CPU, that bandwidth is the difference between 30 FPS and 60 FPS.
The uber-pass reads the HDR buffer once, applies all effects in registers, and writes once. The intermediate results — tone-mapped color before vignette, vignetted color before CA, CA-corrected color before grain — exist only as shader variables. They never touch VRAM. The bandwidth cost is one read of pre_aa and one write to the swapchain, regardless of how many effects are enabled.
We made this choice for performance and because the injection system is the modularity. The shader has four injection points that let users splice their own effects at specific positions in the chain — before the built-in effects, after tonemapping, after grain, or at the very end. This lets users chain their own effects at shader-build time without paying for intermediate textures or pass boundaries. The modularity lives in the WGSL source, not in the frame graph.
How the Uber-Pass Works
The PostProcessPass runs four GPU stages in sequence every frame:
-
GPU volume blending — A compute shader evaluates all active post-process volumes, blends their settings by priority and proximity to the camera, and writes the blended result directly to the postprocess uniform buffer. This replaces the old CPU-side volume blender entirely and scales to arbitrary volume counts.
-
Auto-exposure — A compute shader builds a luminance histogram of the HDR frame, reduces it to average log-luminance, and writes it to
avg_luminance_buf. -
Bloom extraction + downsample — A compute shader extracts bright pixels into a bloom mip-0 texture. Then four sequential compute dispatches downsample 2× each, producing a 5-level bloom mip chain. Gated by
bloom_active— when no active volume has bloom enabled and the camera's bloom intensity is zero, the entire bloom path is skipped. -
Uber fragment shader — A fullscreen triangle draw (
draw(0..3, 0..1)) runsfs_uber, which samples the HDR color, applies effects in sequence at each injection point, and writes toctx.target.
The struct looks like this:
The Injection Point System
The shader has four injection markers: //%P0 through //%P3. Each corresponds to a position in the effect chain:
| Marker | Position | Built-in effects before | Built-in effects after |
|---|---|---|---|
%P0 | Pre-blend | — | Exposure, bloom, color grade, white balance, tonemap |
%P1 | Post-tonemap | Tonemap | Vignette, CA, grain |
%P2 | Post-grain | Grain | DoF, motion blur |
%P3 | Final | Motion blur | — |
User effect entries are grouped by position. The shader builder (build_shader_source) replaces each marker with a function call to the user's injected code. The function definitions are appended at module scope, keeping fs_uber clean.
Two API styles are supported. The legacy API accepts a complete fn user_effects(...) definition and injects it at the Final position, matching the old pass-through behavior:
The new API supports multiple effects at different positions:
Each entry is a bare WGSL expression that receives (color: vec3<f32>, uv: vec2<f32>, dims: vec2<f32>) and returns vec3<f32>. The shader builder wraps it in a generated function.
Pipeline rebuilds are deferred. set_user_shader() stores the snippet in pending_shader_snippet and returns immediately. The actual device.create_shader_module() call happens in prepare() at the start of the next frame, where the device reference is available through PrepareContext. This eliminates the frame-time spike from synchronous shader compilation.
GPU Volume Blending
The old volume blender ran on the CPU: iterate all volumes, evaluate camera containment, sort by priority, blend hierarchically, upload a single struct. This worked fine for level-design volumes (tens to low hundreds) but would not scale to thousands of dynamic volumes.
The GPU blender replaces this entirely. The volume data is uploaded to a storage buffer (pp_volumes_buffer) by the renderer each frame. The cs_volume_blend compute shader runs as a single workgroup dispatch before the other sub-stages:
The shader reads camera position from the camera uniform buffer, evaluates each volume's AABB against it, computes blend weights with distance falloff, sorts active volumes by priority (insertion sort in shared memory), and hierarchically blends from the camera's base settings toward each volume's settings. The blended result is written to a blend_output storage buffer, then copied to the uniform buffer that the uber-pass reads.
The GpuPostProcessVolume struct includes an unbound flag for volumes that apply everywhere regardless of camera position:
The renderer now uploads camera defaults to the postprocess buffer and lets the GPU blend compute produce the final per-frame uniforms. The CPU-side PostProcessBlender is retained for offline use and as a reference implementation but is no longer called in the render loop.
Effects Are Opt-In
All built-in effects are opt-in by default. TonemapOperator::None (value 5) skips tonemapping entirely, the exposure compensation defaults to 0, bloom is disabled, color grade parameters are identity, and all spatial effects (vignette, CA, grain, DoF, motion blur) are disabled. The built-in chain is a pure pass-through until you explicitly enable something through PostProcessSettings or a volume.
This means the old behavior — where user_effects was the only thing running in fs_uber — is preserved. Users who provide a complete post-processing pipeline in their injected shader see their output directly. Users who want to layer built-in effects on top of custom effects can use the injection points (PreBlend, PostTonemap, etc.) to position their code relative to the built-in chain.
The Effect Order
Inside fs_uber, effects are applied in a fixed order:
The ordering rationale:
Tonemapping defaults to None — if the user's injected shader handles tone-mapping, the built-in tonemapper is skipped. If they want ACES or Filmic tonemapping applied to their custom effects, they enable it through PostProcessSettings and place their effects at PreBlend.
Color grading with identity defaults — the color_grade function applies multiplication by gain, pow with gamma, and multiplication by contrast and saturation. With all values at 1.0 it's a pure identity, adding zero cost to the common case. Users who don't set non-identity color grading values never pay for it.
Spatial effects are individually gated — vignette, CA, grain, DoF, and motion blur each check their _enabled flag and return the color unchanged when disabled. The depth read for DoF is unconditional (a single textureLoad is ~1 cycle), but the DoF blur loop only runs when dof_enabled is set.
Why No 3D LUT
The color grading system is entirely procedural — saturation, contrast, gamma, gain, offset, and white balance are all parameter-driven math in the shader. There is no 3D LUT for color correction.
A 3D LUT is a baked color transformation. You generate it offline in DaVinci Resolve or Adobe Speedgrade, then sample it during rendering. The cost of a LUT is that it's baked — you cannot smoothly interpolate between two LUTs and get a correct result, and you cannot change the white balance temperature by 500K without regenerating it.
Helio's procedural grading covers the operations that games actually need to change at runtime: exposure adaptation, bloom intensity, vignette during low health, temperature shifts between day and night. These are all parameter-driven and change per frame. A LUT would be updated every time a parameter changed, which defeats the purpose of pre-baking.
For applications that need film-grade color correction, the procedural system can be extended with a LUT sampling step after color grading and before tonemapping. The injection hook at PostTonemap is the right place. But the default system ships without one because the procedural parameters cover the runtime use cases with better flexibility.
The Custom Parameters Buffer
Injected shaders often need per-frame data — animation time, effect intensity sliders, mouse position. The set_custom_params() method provides a generic storage buffer:
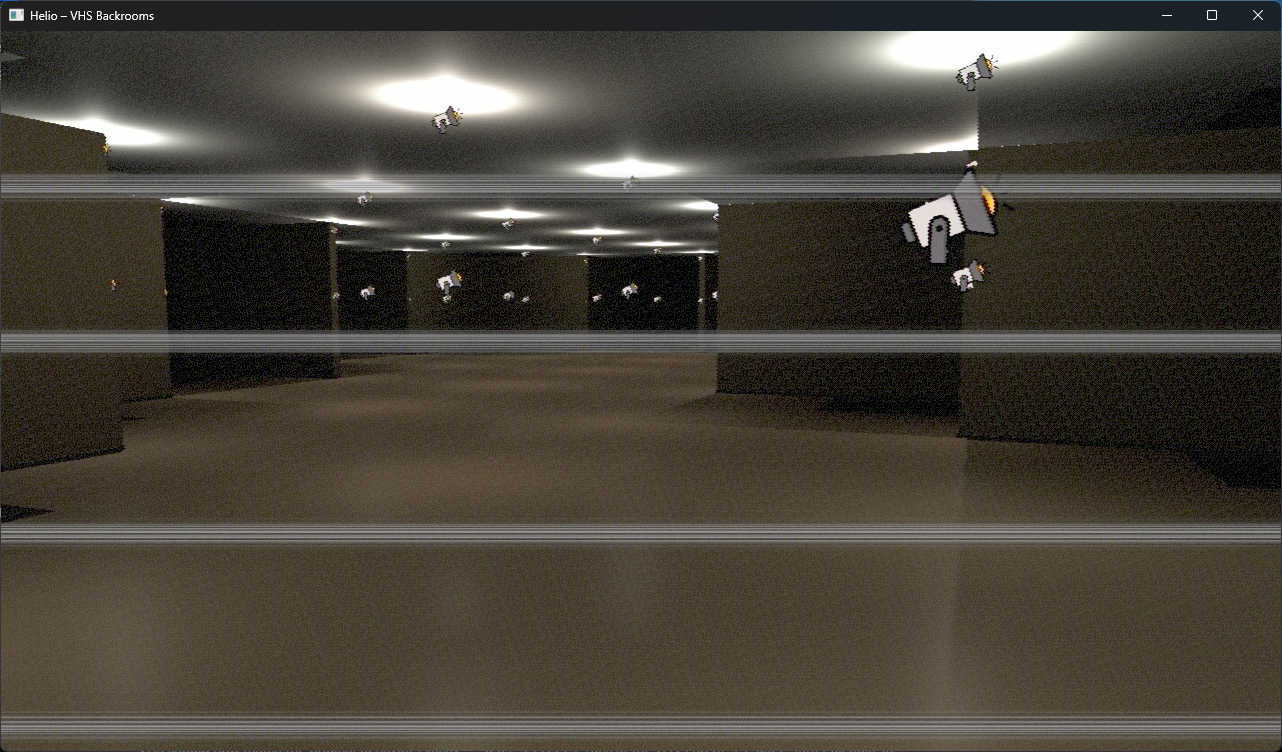
The buffer is bound at @group(0) @binding(14) as pp_custom: array<vec4<f32>> with capacity for up to 64 vec4s. The VHS backroom example (crates/examples/vhs_backrooms.rs) calls this every frame:
Auto-Exposure
Auto-exposure uses a luminance histogram computed on the GPU. Each workgroup processes a 16×16 tile of the HDR image, computes luminance using Rec. 709 coefficients, and increments shared-memory histogram bins (128 bins, logarithmic spacing from 10⁻⁴ to 10⁴ nits). The reduction weights each bin by its count so that bright pixels that occupy a small area don't dominate the average.
With ExposureMode::Manual, the compute dispatch is skipped entirely.
Bloom Gating
Bloom runs five sequential compute dispatches: one extract + four downsample. These are gated by a bloom_active field set by the renderer each frame. When no active volume has bloom enabled and the camera's bloom intensity is below threshold, the entire bloom path is skipped and the textures are never written. This saves ~20 µs on desktop and more on mobile.
The camera's default bloom_enabled is false and bloom_intensity is 0.3. When volumes are present, the renderer conservatively sets bloom_active = true since a volume may enable it. The GPU volume blend then produces the authoritative bloom state, and the uber-shader's bloom composite is guarded by both bloom_enabled and bloom_intensity > 0.0 in the shader itself.
Still to come
The volume blend is a single-threaded dispatch. cs_volume_blend runs with @workgroup_size(1, 1, 1) and iterates all 256 potential volumes serially. This is fine for current use cases but should be a parallel reduce for very large volume counts. A multi-pass approach — first dispatch evaluates volumes in parallel and writes weights, second dispatch sorts and blends — would scale to thousands of volumes without increasing dispatch overhead.
User effect entries should support ordering between entries at the same position. Right now entries are applied in insertion order. Users who add effects at PreBlend from different systems (e.g., a damage overlay system and a weather system) have no way to control which runs first. An explicit order field or a priority system would let them specify the sequence.
The set_user_shader API should be removed in favor of add_user_effect. Both exist for backward compatibility. The legacy API accepts a complete function definition and injects it at the Final position. The new API is cleaner but the old one is still used by the VHS example and other existing code.
Helio is open at github.com/Far-Beyond-Pulsar/Helio. The post process code lives in crates/helio-pass-postprocess/ for the GPU pass, crates/libhelio/src/postprocess.rs for the types and GPU volume structs, and crates/helio-default-graphs/src/lib.rs for the graph builders.